DIY Corner: Replacing Lost PowerBook G4 Feet
One of the complaints about the first-generation PowerBook G4 is that the rubber feet easily wear down/tear off leaving the owner with a very hot machine that sits directly on the table. Not good for the table, not good for the machine.
Since losing the rubber feet on my machine, I’ve been using the low-tech solution of drink coasters to keep an adequate gap from the surface of my desk. The problem with this solution is that I’d often forget the coasters when traveling, leading to the very real danger of overheating the machine.
The replacement cost of the feet is $20 for a set of four. That may seem outrageous, but somebody has to pay for Steve Jobs’s weekly oatmeal colonic, right?
Being an engineer, I figured I could do better, and with a little ingenuity I did. Now you can, too.
The Materials
The items required are easily procured:
-
A package of 3/4" Scratch Guard™ Surface Protectors (I got mine at OfficeMax for $5).

Unfortunately, they were much larger than the feet they were replacing: 3/4" versus the 1/4" holes they were to fill. This turned out to be a less of a problem than expected, because of…
-
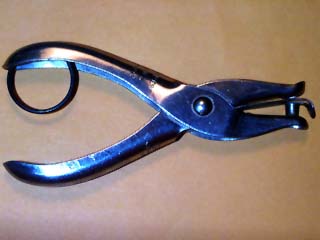
A sturdy hole punch.
The Procedure
-
Carefully punch the center out of each of the 3/4" disks. If you’re really careful, you can punch it out and save the paper backing; if you’re a klutz like me, you’ll accidentally punch it out in such a way that the protector flies into your face causing you to ruin part of the paper backing. Safety Tip: make sure the punch is pointing AWAY from your face.

Note that you still can use the remaining part of the protector for something else! Misers rejoice!
-
Next, clean out the socket where the rubber foot was using alcohol and a cotton swab. Let dry.
-
Remove the paper backing from the protector and insert it in the hole. It’s a little larger than the original foot, but it will go in with almost no effort.

Conclusion
The benefits of making your own plastic feet are obvious:
- Cost. $5 for a package of 20 polyurethane feet beats $20 for a package of 4 any day of the week.
- Quality. These plastic feet are much tougher than the original rubber feet that came with the PowerBook, and the glue is better.
- Stability. These plastic feet are much better at gripping than the original feet (the PowerBook will not slide on the desk), which means it is unlikely that the laptop will fall to the floor if accidentally bumped. Been there, done that, paid the repair bill.
I hope you’ve enjoyed this week’s DIY corner. Join us next week when we try to figure out how to wire a 1998 Buick Century for ubiquitous recording.